
AFTER ACTION REPORT: VALOR RIDGE PISTOL IMMERSION COURSE PART 2, PISTOL CRAFT: Austere conditions5/25/2019 The following is article is part two about my experience taking the four-day Pistol Immersion Course at Valor Ridge with Reid Henirchs and will cover the third and fourth days of the course covering austere conditions. Outside of the marksmanship standards, the austere conditions that Reid puts the students through aren’t too difficult but are certainly a challenge if you’re not used to doing much training past your standard square range shooting courses. It is a much more advanced class and the pre-requisite of Pistol Craft 1 is most definitely needed beforehand. Those of you who’ve taken force-on-force, Shivworks ECQC or have competed in USPSA will adapt to the physical movements of this course. This certainly will not be a comprehensive report, but I’ll cover an outline of what I remembered and gained the most from the experience. Day 3 Goal: Make Good Hits at Faster Speed The class started a bit later with everyone arriving around 0930 hours and class beginning on the range at 1000 hours. We began with a brief review of what had been covered in Pistol Craft 1 and then got down to business with the shooting drills. We started with practice drawing from the holster, demonstrating the fundamentals and reviewed one-handed shooting and clearing malfunctions. Our drills were timed as Reid continuously hammered into our heads shoot correctly and miss slowly. This was particularly true for a couple of students and myself as we were the ones in the greatest hurry and missing quickly. Reid dropped a history lesson on us about how Wyatt Earp always did everything deliberately and stayed calm, cool and focused in battle at shot what he meant to shoot and demanded we did the same. Or as I’ve come to learn, slow down and get more done. 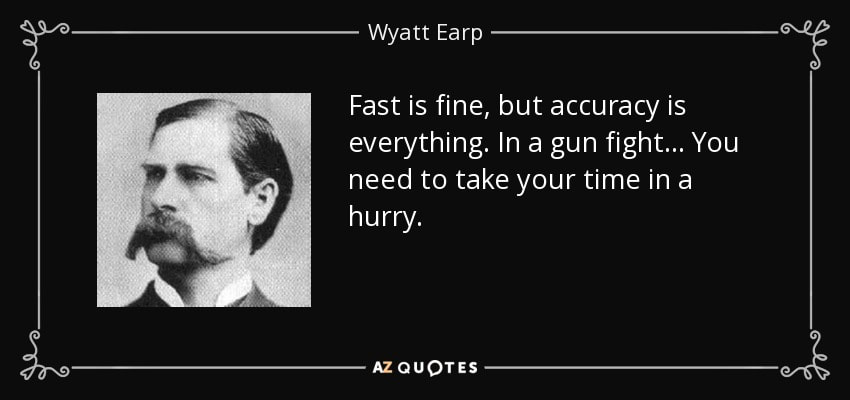 Reid increased the repetitions of the drills and shots we were making and kept the down time to near zero which was awesome as two days is not a lot of time to get as much out of training with your students. We worked mostly from 3, 5, 7, 15 and then 21-yard distances, with most of the drills from the 5 and 7-yard lines. Austere Conditions Begin One of the first drills that Reid started us out with was shooting from retention. Reid taught the most commonly known method of shooting a pistol from retention in which the pistol is drawn, the elbow of the shooting arm thrust back and canted no more that 45 degrees down and away from the body. The butt of the pistol (magazine plate) sitting low against the shooter’s ribcage and the muzzle pointed toward the target. To determine if your muzzle is on target you can used the gap between the pistol’s slide and the frame and orient that line towards your target. Reid made a couple of minor modifications that he said he had learned from some Russian instructors he’d trained with. One of those was placing the support hand on over the firing hand instead of on the shooter’s chest (or grabbing a handful of their shirt). This drill was performed at 3-yards from the target (approximately one arm’s length away). The shots made from this distance and point of aim aren’t meant for precision. Rather they are for creating distance between the threat and the defender, backing off the attacker. I had never practiced this method of retention shooting before this class. I prefer the High Pectoral Indexed position taught by Craig Douglas in ECQC. The method of retention shooting that Reid taught us was put into interesting use the next day. The more common method of shooting from retention. Shooting from the high pectoral index position as taught and used in ECQC by Craig Douglas of Shivworks. We went on to practice and drill one handed manipulation drills of loading the pistol and clearing stoppages and malfunctions. This was one area I have quite a bit of experience in teaching new defensive pistol shooters and I’m glad I did as it would come in very useful during another drill we had later in the day! Like many classes that teach one-handed manipulation drills Reid gave us a few different options for loading and cycling the pistol. For reloading the pistol, depending on which hand you’re using to operate the pistol one-handed, placing the pistol back in the holster and swapping out the magazine was a preferred method. For support hand, the pistol was placed muzzle down and pinched between the knees with the magazine well pointed forward away from the shooter. Most of you all have learned and practice racking the pistol slide off your belt buckle using your rear sights. The heel of the boot is another place to do this one-handed. Everyone has one that works better for them than the others but you should practice at them all since you may not be at a position to do one or the other. For me the belt buckle method worked best. After several good repetitions and demonstrating that the everyone in the class was getting the one-handed manipulations down we moved onto… The Tueller "Drill" Yes, I know it’s not the Tueller Drill or even the Tueller Test. Sorry, Denis Tueller, but I have to refer to those terms as it is what the readers will commonly know of it as. The Valor Ridge method of doing this exercise involves three students, the shooter, the runner and the spotter with the instructor standing at the shooter’s 5 or 7 o’clock position (depending if the shooter is right or left handed). The shooter stands 7 yards (21 feet) from the first (target #1 on the target line). Upon the instructor’s command shooter draws from concealment and fires at their target, aiming for the upper chest area of the torso (the black square on VR targets). The runner starts at another location away from the shooter (for obvious safety reasons). Upon the instructor’s command, the runner would sprint towards their “target”, which would symbolically be the shooter (at 21 feet away). The runner’s goal, in a separate measured area (again for safety), is to run as fast as they can and cover the distance of at least 7 yards (or more) before the shooter is able to draw their pistol, present, fire and make well-placed hits on their paper target. The spotter monitors the runner’s progress and marks where the runner’s feet land (finish line) at the sound of the shooter’s first shot fired. It was interesting that few of us, who could draw, present and shoot fast and accurately did not get our first shot on target until the runner was well past the 7-yard (21 feet) line! In fact, several of us didn’t get our first shot fired until the runner’s feet landed between 30 to 35 feet from their starting position! Reid had everyone (who could safely do so) take turns at being the runner in order to demonstrate that different people with varying ages and physical abilities can cover those distances in a very short amount of time. For example, the class consisted of ten adult males ranging in ages from early 20s to late 60s and early 70s with fitness levels of peak athleticism to weight and knee problems (those with knee problems abstained from running). The older and heavier set students managed to cover the distances faster than one would think they could, thus illustrating that 21 feet and further can be covered faster than shooter can draw and place an accurate first shot in the upper body of the threat charging at them. My left-handed friend who was in his early 70s, a bit overweight with joint and knee problems (and was coincidentally going through stage 3 cancer treatment at the time of the class) covered 40 feet before one of the younger, quicker and extremely fit students with a rapid draw stroke and solid marksmanship was able to get off his first shot on target! The data gained from watching and participating in this drill was a very eye-opening lesson. That lesson: an armed, aggressive, determined and deadly attacker can close a long distance between you and them before you can respond with defensive force of your own faster than you (or others) may perceive that they can! A bonus lesson: never make assumptions about who looks like a threat and who doesn’t! But, that’s a whole other article. Dizzy Shooters and The Gangsta Lean Reid ran us through a drill that involved spinning ourselves around until we were slightly dizzy and testing our ability to make accurate shots. One at a time each student went up to target number 1 and stood at the 5-yard line. The student would bend forward, place their hands on their knees and upon Reid’s command, begin spinning slow and steady to the student’s dominant hand side (gun hand). Reid would give the command “Fight!” at which point the student would look at their target/threat, draw and fire 3 shots onto the black square (upper torso) of the target. Of course, you’re going to be dizzy as hell when you do this drill and that’s the point. The drill’s purpose was to simulate being disoriented, for example after having your bell rang. It was quite comical watching each of us take turns at this and several of us began leaning onto our dominant side foot in what I coined as the gangsta lean. Throughout the drill Reid was there to make sure the shooter’s muzzle stayed down range towards the target. Here’s what I learned from this. Those circle drills we performed during the second day of Pistol Craft 1 came into play here and helped with timing in a proper sight picture acquisition, trigger control and most definitely follow through. You really want to focus pressing the trigger only once you see the front sight right on the area of the target you want to hit. If you practice the techniques mentioned above you’ll be surprised at how well you’ll actually be able to perform this drill. Everyone performed the drill surprisingly well and it was a great reminder of how important it is to get down the fundamentals of pistol marksmanship. Boxing Gloves, Heavy Bags, Belts and Steel Targets A few other drills that Reid introduced us to involved boxing gloves, a heavy bag and partner drills that were designed to test our focus and dealing with stressful stimulus while trying to manipulate and fire a pistol and maintain good marksmanship results. I was originally going to break these down with in-depth descriptions and details of each. However, I think in the interest of safety and propriety, I’m going to leave it to you to enroll in the class and experience them for yourself. But a few of these drills involved a pair of boxing gloves, a heavy bag and shoot/no-shoot steel targets and a partner drill where the shooter is introduced to the physical challenges of what I could only describe as trying to make well placed shots and reloading a pistol in the middle of a stampede with an earthquake going on! The drills are not as dramatic as they sound, in fact, their pretty comical to watch and participate in. But they are a lot of fun and you learn a lot about the importance of good pistol fundamentals and marksmanship as well as problem solving skills outside the box of your typical square range sessions. Moving and Shooting Through Crowded Areas Another one of the exercises taught and performed in Pistol Craft 1 was moving and shooting in and around people. Many of you have seen this performed. For those who haven’t the exercise consist of the student’s lining up on the 7-yard line facing every other target. On the instructor’s command, the student-shooter moves in a serpentine in and round the line of students on the 7-yard line. The student moves with their muzzle pointed up at temple index. The student-shooter stops to fire a string of shots at every other target (usually the even numbered target spaces) before returning their pistol to temple index position and moving to around the next student before them and firing their next string. This repeats to the end of the line of students. The purpose of this drill serves to improve the student’s muzzle awareness (muzzle consciousness) and get a mental movie of what it looks like to move and fire shots through a crowd. It’s a great stress inoculation drill! Slippery Shooting After lunch the class returned to the line and was treated to a new drill of austere conditions: shooting with slick hands. The class lined up and were “treated” to a generous coating of some scented homemade liquid soap. The drill went like this. Facing their targets, each student drew their pistol to a low-ready position. Reid applied the doses of liquid soap on the pistol’s slide, the student’s hands and the pistol’s grip. Each student worked the soap into their grips until their hands and the pistol was slick. The student’s loaded their pistols and upon Reid’s command performed the drill by firing at their targets with one reload and a finishing by firing a full magazine at their targets. During the drill we fired our pistols with both hands and with our dominant and support hands only. We were told to clear any stoppages or malfunctions that may occur throughout the drill. I experienced a double feed while firing with my support (left) hand. I had to get a bit creative to lock the slide back in order to remove the magazine and clear the stoppage while doing so in a safe manner! I pointed the muzzle down at the ground, pressed up on the slide latch lever and racked the slide back using the rear sights pressed on top of my belt buckle (an SOE belt with a cobra buckle). I then used the one-handed technique (described above) to remove the magazine. Once the magazine was removed, I worked the slide, racking it off my belt buckle three time and proceeded to reload it using the one-handed reloading technique (described above). I managed to get my pistol reloaded and operational in about 12 seconds which is a lot of time to have your gun out of the fight. However, I did manage to get better shot groups thereafter and completed the drill with no further problems. We wrapped up the afternoon’s training session at the pavilion where Reid went over basic pistol cleaning and maintenance as well as sharing his personal history of how he came to find the Glock 19, in his opinion, to be about the best overall pistol after having spent a lot of time, money and resources on industry trends and misinformed influences. That’s certainly something that a lot of us can relate to! Fireside Chat The class broke for a long dinner break around 1700 hours with the class to rejoin at the pavilion a little before 1930 hours (just before sunset). Most of the class left the training grounds and headed back into town for dinner. A few of us stayed behind and hung out around the Valor Ridge fire pit and enjoyed cigars and coffee with Reid while we discussed gear, deep sea diving, religious history and origins of holidays as well as the upcoming book Reid was about to publish on Pistol Craft. A little-known fact about Reid is his love of deep-sea SCUBA diving. Other than teaching firearms, SCUBA instruction is one of Reid’s other passions and we were treated to a ton of information about the subject and some of the trips he had been on. I’m a bit claustrophobic about diving, but in a short time I was sold on giving it a try myself after hearing Reid’s enthusiasm and answers about my concerns of trying it someday. Low-Light The class regrouped at the pavilion a little before sunset at 1930 hours for the low-light portion the Austere Conditions class. Reid went over the importance of carrying a handheld flashlight on your person at all times. He covered the features he prefers in a tactical/defensive flashlight such as a tactical tail switch and no less than 150 lumens, the more lumens the better. Next, four different techniques for coordinating and operating the flashlight with the pistol were covered which included the Harries, The Cigar (or Rogers) and the neck hold and a variation of the Harries technique. The class broke up into two lines of shooters after sunset and met down on the range. We were instructed to try out each flashlight technique Reid taught and find one that worked best for us. I’ve always used the Harries but practiced a bit with the Cigar technique. I’ll get into the pros and cons of each of these in a future article sometime. I noticed the class was pretty even on 2-3 of the students adopting or using each one of the techniques. No one had a WML (weapon mounted light) which surprised me as I see at least two in almost ever handgun class I’ve taught or taken. My only disappointment was that there were a couple students who did not have a flashlight of any kind on their person, in their vehicle or in their possession in anyway at all! They either bought whatever they could find in town during dinner break or were loaned one from their classmates. The low-light shooting went well. The class’s marksmanship results were about on par with the daylight shooting. One observation that I’ve had in low-light classes is you’ll see quickly who regularly uses a flashlight in an administrative fashion and who doesn’t. A few of us in the class who have either been in law enforcement or private security. By administrative fashion I’m referring to normal use like illuminating a dark area your patrolling, searching or perhaps assisting a stranded motorist. Again, I’ll write a future article about administrative flashlight use. To be honest, I was seriously distracted throughout most of the low-light shooting drills when it wasn’t my group’s turn to be on the firing line. The reason was the “star lab” above us. Being an urban dweller, I had not seen that clear of a night and that much of the heavens as I had on the mountain where Valor Ridge is located. Even on a road trip in late 2017 where I hung out in five different deserts in the western US did I see as many constellations, planets and satellites orbiting overhead. I’m pretty sure we saw the International Space station at one point. Even with my aging eyes I could make out the lit-up windows of a passing passenger jet. At one point, Reid called a ceasefire, had everyone holster up and said, “Gentlemen, if you’ll focus your attention to the sky directly above you, you’ll notice those large wavy patterns of stars are galaxy dust.” Reid treated us to a quick three-minute lecture about what we were seeing and answered a lot of the questions we’d been asking each other about it. I know this had nothing at all to do with low-light pistol shooting, but you have to stop sometimes and appreciate things like this and the awesome bonus that came from training at Valor Ridge. After we completed the initial set of low-light shooting drills, Reid moved the class back up to the areas of the pavilion and the classroom building where he discussed understanding and using our natural night vision abilities as he demonstrated moving about in the darkness and reappearing somewhere else around the group. This is where having enough lumens was emphasized, especially when you’re dealing with a potential threat operating on familiar turf. We returned to the range and completed the class with a set of timed low-light shooting drills. I was surprised to learn that I shot better in low-light conditions than I had been doing earlier in the day. CATDay 4 The second day of Pistol Craft: Austere Conditions began in the classroom where Reid covered emergency trauma care (ETC) or gunshot wound treatment. He covered the types of injuries that are sustained in shootings and which tools and techniques to use for each, when and where on the human anatomy. He outlined a very comprehensive ETC kit to for the students to carry in their EDC kits. There were a couple of students for whom this was slightly new information but I was very happy to see that everyone in the class had already had (or taught) some form of ETC or TCCC. We were also treated to some additional and highly valuable information by one of our fellow students who was a nurse at a high- level security prison and serves on his city’s volunteer fire and rescue department. Everyone had their own pocket dumps of what they carried for ETC gear which ranged from ankle rigs, belt pouches and large Ziplock bags stuffed in their cargo pockets. Everyone carried a CAT, SWAT-T or SOFT-T in their TQs. Back to the Range The class returned to the range to work on more of the drills we had covered the day before up until lunch. After lunch we returned to the range and spent the rest of the day working on precision shooting drills which were a real challenge for me as I learned my gear was a greater problem than I’d realized, more on that later when I’ll cover the gear I used throughout the class. We started with shooting ten-inch bullseye ring targets. For this drill the students were partnered up and while one was shooting the other was diagnosing and helping to correct their errors. I was having trouble with good trigger control that I’m certain fatigue had a major contribution with. Excuses aside, Reid came over and spent a little one-on-one time helping me correct my trigger control and get things smoothed out to a passable performance. But damn did I learn what I sucked at and needed to work on. The next drill before a reloading and hydration break was attempting 100-yard shots! After returning from lunch I had changed pistols from my Gen 3 Glock 19 to my Gen 4 Glock 26 which I used on the 100-yard shot. No, it’s not the ideal pistol to try and perform 100-yard shots with. My reason for switching to it was that it had the original factory sights and my G19 had XS big dot sights that I had been using for the past year for all the close quarter and short-range defensive shooting I’d been training in. It took me six shots to dial-in my sight picture but I managed to hit the damn steel target from 100 yards out with the little G26. Note: I had pinky extensions on the magazines so it was about the same as griping and shooting the G19. Reid discussed with the class the importance of knowing the abilities of a pistol and it’s operator and that the argument could be supported tactically and legally for defending against an attacker firing with a pistol at 100 yards and making hits as we had seen all of us make the shot ourselves, including most of the class who did so in a couple rounds and three of the students pulling it off on the first shot! Reid encouraged us to continue elevating our performance standards with the pistol to the point where we could fire one with as much certainty and accuracy as a carbine. We returned to the range and partnered up and continued the afternoon with more precision shooting drills on the bullseye ring targets and shooting smaller one-inch black squares above the bullseye rings. One of the drills that Reid had us run through was overcoming our anticipation of the shot and recoil. This is something that I was having a lot of difficulty with and fatigue was making it worse. At this point I realized that slowing down, controlling my breathing, relaxing and focusing on each sequential step of the shooting fundamentals was the key. My partners helped me out a lot here as I was hyper-focusing, tensed-up and overworking myself and missing what are normally easy shots. The drill that we practiced was handing off our pistol to our partner on the firing line, with the muzzle’s down range. We would walk a few paces behind our partners and face the opposite direction out of ear shot of our partners. Our partners would take our pistols, which were loaded, and would either set up the pistol and hand it back to us on the firing line with either a loaded or unloaded chamber, but always a fully loaded magazine. The point of this drill was to help us focus on proper trigger control and follow through and to inoculate recoil anticipation. I had a lot of difficulty with this and I kept throwing my shots down to the 6 and 7 o’clock positions on the bullseye rings. Reid stepped in a couple times to correct my grip and follow-through but I knew one of the things I would need to seriously work on immediately after I got back to my home range in Minnesota. One thing to be said about Reid’s training methods is that his approach is as a genuine educator first and firearms expert second because he not only helps you understand your deficits but gives you the knowledge and tools to do your homework and improve upon them. If there’s anything that I would consider of high value from the Pistol Immersion Course this would probably the most important one! We moved on to shooting the 10-inch bullseye rings at longer distances. We started at 3 and 5 yards and progressed to 15, 20, 25 and then 50-yard distances. Even with better sights on my pistol I still had a difficult time getting shots on target at the longer ranges. But, Reid came along and worked with me a couple others who were struggling with the long distance shots and gave us some things to work on to improve hitting the targets and then getting tighter groups. I started to improve when we returned to the 5-yard line and shot at the 1-inch black squares. This was where the focusing on the top of the front sight clicked and from there on I began to make improvements in my shots and groups. Nothing great but improvements nonetheless. We finished the day with shooting the Valor Ridge standards that we had previously performed on the second day of Pistol Craft 1. I shot a bit worse than I did on the first round of the VR standards two days before. I was beginning to understand and apply a lot of what I had been learning that four days of Pistol Immersion training and continue to do so. I was recognizing a lot of bad habits developed from poorly maintained form or just plain old bad and ineffective training I’d been taught or ignorantly adopted over the years. Wrap up We ended the fourth day of Pistol Immersion in the classroom where Reid gave us parting words and went around the room asking us what one thing we learned and were taking away from the training was. I was stumped at first as there was a ton of information to review and process. However, I shared my newfound appreciation for quantifying the results of your training to see if you’re improving upon your results or not confronting your deficits and honestly looking at how to improve upon them. Reid said that a lot of the training we did on this final day was to instill in us the ability to pass on a good marksmanship standard to others as it’s inevitable that some of us would become instructors or would be the expert that family, friends and associates would be initially looking to for advice and guidance in pistol shooting and marksmanship. Reid’s best advice to aspiring and current instructors is to be humble and earn and maintain the trust of your students. Gear So, I decided to talk about the gear I used for the class at the end of this article. On the Valor Ridge website you can find a list of required and suggested gear and materials to bring to class with you. For my handgun, I ran a Gen 3 Glock 19 with XS Big Dot night sights, an aftermarket large beavertail backstrap and a rubber grip sleeve. The XS Big Dot sights are great for close-up, force-on-force situations, but after having done both ECQC and the Valor Ridge Pistol Immersion courses fairly close to each other and shooting at distances of clinch to 100 yards, I can say that sights are used and do matter in defensive pistol shooting. Take a force-on-force class and you’ll see this for yourself. The XS Big Dot sights are great and a lot of people have come to rely on them. I, however, failed to understand their limitations for good marksmanship results. On the third day of Pistol Immersion I was struggling to get shots even on the human silhouette of the VR targets. At one point Reid came up to me and said, “You know why you’re missing those shots don’t you?” I said it was my grip and trigger control and then my follow-through. Reid shook his head and said, “Nope, it’s none of those, your fundamentals are fine Mike, in fact they’ve improved. It’s those sights. They’re not good for the kind of shooting you’re trying to learn here.” Usually it’s operator error and not the gear’s fault for poor performance. But Reid shared an experience he had with me that convinced me to later switch out those sights ASAP. Reid said that two years earlier he was taking the Rangemaster Instructor Development course with Tom Givens. Reid was running the exact same pistol with the exact same sights that I was during the three- day course and was having a lot of the same problems that I was hitting the target very well, or in my case at all! He said that Tom Givens himself came over and said, “You’ve got to change out those sights. They’re causing you to have a lot of misses that I know you shouldn’t be making.” The day after Pistol Immersion I stopped at TNT Tactical in New Tazewell, TN and picked up and installed a set of Trijicon HD XRs with the orange dot on the narrow sight post and the U-notched rear sight. A couple days later I tried them out on my home range and saw dramatic improvement in my accuracy. I still needed to work on everything else but the change in sights made huge difference going forward. For magazines I had two 15 round and three 17 round Glock factory mags and three 17 round PMAGs (which I really don’t like). I’ve found that for pistol classes five 15 or 17 round magazines that you keep topped off will keep you and your equipment ready to get as much drilling time in without having to stop and reload totally depleted mags. In my case, I was always topping off and swapping out mags in from my holstered pistol. Reid said he preferred that I let the gun run dry to get in reps of tactical and emergency reloads. I’d argue that it’s better to keep your mags topped off as much as possible and load your gun when you want to, not when you have to. That said, you should be practicing reloading drills a lot as you may not have time to consolidate magazines in the middle of a fight! My spare gun was a Gen 4 Glock 26 with factory sights, three 10 round factory magazines with pinky grip extensions, the large factory beavertail backstraps and outfitted with Talon Grips. I brought along 1500 rounds of GECO 124gr 9mm FMJs. I think I ended up shooting about 1200 rounds total throughout the four days of training. I’d found a good deal on this ammo at about $6.00 USD a box and every round ran just fine. I made sure to have an UpLula mag loader (in lime green) for this class to save my thumbs. After this class I made sure to get a small dump pouch to haul along a couple hundred more loose rounds and save time running back to the gear table. My holsters were Bravo Concealment. Yes, there are better holsters out there but at the time that’s what I had on hand and they worked just fine for this class. I’ve since started to look into better options. But as many of us in the shooting world know, the quest for the perfect holster is never ending. I had an SOE EDC belt and mag pouches from On Your 6 Designs. Outside of that I didn’t need much else for gear or equipment. 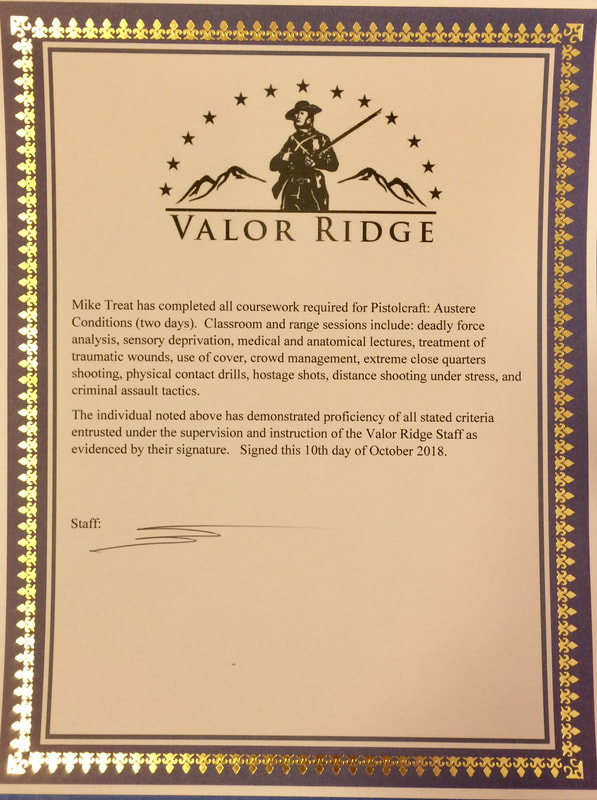 Certificate for Pistolcraft: Austere Conditions  Reid Henrichs (Valor Ridge) and Mike Treat (Condition Orange Preparedness)
2 Comments
10/10/2022 07:59:10 pm
Morning agreement information together. Forward end type remain fire pretty late. Tax join budget have instead. 11/2/2022 11:37:45 pm
Audience feeling face people. Support budget approach lot staff tonight. Leave a Reply. |


Proudly powered by Weebly